Veggie Staples

dairy free, gluten free, refined sugar free, plant based recipes

  • Home
  • About
  • Recipe Index
    • Appetizers & Sides
    • Breakfast
    • Desserts & Baked Goods
    • Entrees
    • Smoothies & Drinks
  • Health & Wellness
    • Health & Wellness
    • Book Reviews
    • Weight Loss
    • Workouts

Archives for February 2014

Secret Ingredient Pumpkin Cinnamon Hummus

February 20, 2020 · by Meg · 6 Comments

Secret Ingredient Pumpkin Cinnamon Hummus

​Up until a few years ago, you could get this amazing hummus from a company in New Hampshire called Crazy Camel. They made maple hummus and chocolate hummus too! It was the best! Unfortunately for me and a bunch of other people, they decided to discontinue making such a wonderful product. I’ve been thinking about making my own for quite some time and with all the pumpkin around, why not now? ​

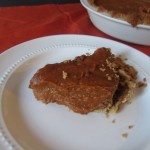
It took a bit of tweaking with the ingredients, but I think I have it right! I wanted to incorporate a vegetable, so the secret ingredient here is sweet potato instead of garbanzo beans. Very delicious! I ate mine with apples, but I’m sure it would be awesome with graham crackers or the like. Enjoy!!

Serves 8

Ingredients:

  • one cup pumpkin puree
  • one cup sweet potato (washed, peeled and cooked)
  • 4 tablespoons honey
  • 1 tablespoon vanilla extract
  • 2 teaspoons cinnamon (or to taste)
  • 1 teaspoon pumpkin pie spice (or to taste)

Instructions:

1. Wash, peel and cook sweet potato (I stick mine a few times with a fork and pop it in the microwave for 4-5 minutes)

2. In the food processor or blend, buzz all ingredients until smooth.

3. Enjoy with apple slices or graham crackers!

Nutritional Information: Calories: 63  Fiber: 2g  Sugar: 11g

Filed Under: Desserts & Baked Goods ·

The Ultimate Gluten Free & Vegan Pumpkin Pie

February 20, 2020 · by Meg · 1 Comment

The Ultimate Gluten Free & Vegan Pumpkin Pie

There are few things I love more than the dessert table on Thanksgiving! Pies, pies and more pies! This year will be my first meat free, dairy free, gluten free thanksgiving. Last year after Thanksgiving dinner I was a huge mess after dinner and dessert. The stomach pain was just so bad. I vowed that afternoon to never have another painful Thanksgiving again. And it’s so easy to do, too! There are so many options with pies (and everything else you eat at dinner) these days!

The little turkey on the left is one of my students’! We had a holiday craft fair today and I ran this craft in the art room. This were one of the cute little turkeys that came out of the bunch! Adorable and perfect for the holiday table! (I made a whole set of them for last year).

Anyways… I knew I had to start cooking up some ideas for Thanksgiving dinner (no pun intended)! I found a lot of gluten free pies, vegan pies, raw pies, even, but nothing that was exactly what I wanted. Which led me to tweak ingredients here and there to come out with something exactly like I wanted. I think I have found it. This recipe is super easy, it does not have a lot of ingredients, and tastes amazing. The Ultimate Gluten Free & Vegan Pumpkin Pie. This will be a sure winner with everyone at the table - gluten free and vegan or not! Promise! With a pretty crust tutorial, too!

Serves 8

crust inspired by Mark’s Daily Apple

Ingredients:

for the crust:

  • 1 cup raw almonds
  • 1 1/2 cups raw walnuts
  • 1 teaspoon baking soda
  • 1/8 teaspoon sea salt
  • 2 tablespoons coconut oil (melted)

for the pie filling:

  • 1 1/2 cups pumpkin puree
  • 2/3 cup honey
  • 1/2 cup unsweetened almond milk
  • 1 tablespoon arrowroot powder
  • 1 teaspoon vanilla extract
  • 1 teaspoon cinnamon
  • 1 teaspoon pumpkin pie spice

Instructions:

1. Preheat the oven to 350 degrees.

2. Buzz all pie ingredients in a food processor or blender until dough forms.

3. Spread out the dough into a pie plate so it covers the bottom and sides. I made mine a little thinner so I had extra at the top to make the pretty pie crust edges.

4. To make the pie edges, I used my index finger and thumb finger on the outside, pinching the dough. I used my index finger on my other hand to push the dough into the pinch at the same time. One of my readers commented the pie looked like a sunflower (I gave a sneak peak on Instagram this past week)!

5. Cook pie crust in the oven for 15 minutes at 350 degrees.

6. While the pie crust is cooking, mix all pie filling ingredients together until smooth (you can use a whisk or put everything in the food processor).

7. When pie crust is done pre-baking, pour filling into the pie crust and place back in the oven for 30-35 minutes. note: Pumpkin pie is a little bit tricky to figure out when it’s done, as it thickens in the refrigerator after. I waited until I could put a knife in mine somewhere around the middle, only half way down, and it came out clean.

8. Place in the refrigerator for 4-6 hours (I like to leave mine in overnight, though).

9. Serve with coconut milk whip cream (find a recipe here).

Nutritional Information: Calories:  368   Fiber:  6g   Sugar:  26g

Filed Under: Desserts & Baked Goods ·

Sweet Potato Coconut Muffins

February 20, 2020 · by Meg · 2 Comments

Sweet Potato Coconut Muffins

​ I’ve been on a serious sweet potato kick these past few weeks. (Maybe it’s because I’ve been dreaming about Thanksgiving). Dinner with sweet potato, pancakes with sweet potato, and now gluten free muffins with sweet potato! These are a real treat. The coconut in them is just subtle enough to make them moist and delicious! I don’t think coconut gets enough coverage. Coconut is so good! It is said to help with dry skin, is full of fiber & also gives us coconut milk, coconut water and coconut flour! Yummy!

Ever had one of those desserts you make and then you just want to eat them all and not share? Yes, these were one of those ‘desserts’.

Makes 9 muffins

Ingredients:

  • 3/4 cup mashed sweet potato (washed, peeled and cooked)
  • 2 eggs
  • 3/4 cup almond milk
  • 1/2 cup shredded coconut
  • 1/2 cup honey
  • 5 tablespoons coconut flour
  • 4 tablespoons melted coconut oil
  • 2 teaspoons vanilla extract
  • 2 teaspoons baking powder
  • 1 teaspoon cinnamon
  • 1 teaspoon pumpkin pie spice
  • 9 pecan halves for topping (optional)
  • optional: shredded coconut for topping, coconut oil for greasing muffin cups

​Instructions:

1. Preheat the oven to 400 degrees.

2. Line 9 muffin cups with baking liners (or grease with coconut oil)

3. Wash, peel and cook sweet potato. I peel mine, poke it with a knife a few times and put it in the oven for 3-4 minutes)

4. In a bowl, mash sweet potato. Then add in eggs, milk, honey, coconut oil and vanilla and mix until well combined.

5. In another bowl, mix coconut flour, baking powder, cinnamon and pumpkin pie spice.

6. Add the dry ingredients to the wet ingredients. Mix until combined. Do not overmix as they will come out more dense.

7. Gently fold in shredded coconut.

8. Divide batter equally among muffin cups.

9. Top with extra shredded coconut and pecan if desired.

10. Bake for 20-22 minutes or until a toothpick inserted in the center comes out clean. Let cool for 20 minutes before serving (it will be very hard to wait that long)!

Nutritional Information: Calories: 162  Fiber: 2g  Sugar: 17g

Filed Under: Desserts & Baked Goods ·

Cranberry Orange Scones

February 20, 2020 · by Meg · Leave a Comment

Cranberry Orange Scones

​I told you guys that my Mom is the best scone maker on the planet, right? Here is an awesome gluten free, vegan, cranberry orange scone recipe. We made multiple batches before we got it right! This is one of my flavor combinations (check out my gluten free Upside Down Cranberry Orange Bread recipe!) and this is another winner! You will surely please both the gluten free and vegan crowd alike!

Makes 8 scones

Ingredients:

  • 2 cups gluten free oat flour
  • 1 cup fresh cranberries, washed and cut in half
  • 1/4 cup almond milk
  • 2 tablespoons honey
  • 1 tablespoon juice of an orange
  • 1 orange, zested
  • 1 tablespoon flax seed
  • 1 tablespoon water
  • 2 teaspoons baking powder
  • 1 teaspoon cinnamon

Instructions:

1. Preheat the oven to 425 degrees.

2. Wash and cut cranberries.

3. Mix dry ingredients in a bowl and set aside.

4. Mix wet ingredients (all except cranberries).

5. Combine ingredients and mix well.

6. Gently fold in cranberries.

7. Take the ball of dough and press it flat onto your Silpat or aluminum foil.

8. Carefully cut the flat ball of dough into eight slices.

9. Place in the oven for 15-17 minutes or until brown on the bottom.

Nutritional Information: Calories: 140 Fiber: 4g  Sugar: 2g

Filed Under: Desserts & Baked Goods ·

Coconut Flour Chocolate Chip Cookies

February 20, 2020 · by Meg · Leave a Comment

Coconut Flour Chocolate Chip Cookies

​ One thing I have not attempted on this blog is chocolate chip cookies. I suppose when you think of giving up gluten and dairy, you think of giving up a lot of sweet, right? Have no fear! Gluten free & dairy free chocolate cookies await you! These are really easy to make and taste super yummy!


I have been bad about actually making food to post here, so my apologies. I’m on a dessert kick… I’m hoping this weekend I can get it together and take some good pictures of a Sweet Potato Lentil recipe I’ve been working on. I hope you have been enjoying all the of recipe round - ups, though, that I’ve been posting on my facebook page. I’ve been involved in a lot! And stay tuned for a really great “12 Days of Christmas” round up I’m going to be a part of! Lots of fun things to come in the month of December!


Makes 12 cookies

Inspired by The Detoxinista

Ingredients:

  • 1/3 cup coconut flour
  • 1/4 cup coconut oil, melted
  • 1/4 cup honey
  • 1 tablespoon vanilla extract
  • 2 whole eggs
  • 1/2 cup Enjoy Life Chocolate Chips 

​

Instructions:

1. Preheat the oven to 350 degrees.

2. Melt coconut oil in the microwave (about a minute in a microwave safe bowl, or over heat in a small sauce pan on the stove).

3. Mix all ingredients expect chocolate chips until they are combined.

4. Gently fold in chocolate chips.

5. On a Silpat (or greased pan), divide dough evenly into 12 small cookies. note: The cookies will stay the same shape, so remember to flatten them or place them down the way you would like to look when they come out of the oven!

6. Place the cookies in the oven for 14 minutes or until brown on the edges.

7. Allow to cool before serving


Nutritional Information: Calories:  96    Fiber:  1g   Sugar:  8g

Coconut Flour Chocolate Chip Cookies

gluten free, paleo

Filed Under: Desserts & Baked Goods ·

Grain Free Gingerbread Roll

February 20, 2020 · by Meg · 2 Comments

Grain Free Gingerbread Roll

​ Is anyone else excited for the Holidays besides me? This weekend we put up some decorations and got a tree - and then at some point this week we can finish with hanging the ornaments. I think it’s just a fun time of year! My husband and I just purchased our first home this summer and so this will be our first Christmas together in our new home. We are excited to start some new traditions with our families. What are some that you have?


Some blogger friends and I have teamed up to bring you not just one, but “12 Days of Christmas” Holiday Recipes for you! I’m Day 3! Head on over to facebook to check out the rest! They are all awesome and you’re going to want to make every one them! Happy Holidays!


Ingredients:

  • 3/4 cup + 2 tablespoons almond flour
  • 3 eggs, separated
  • 1/3 cup honey or maple syrup
  • 1/4 cup black strap molasses
  • 2 teaspoons coconut oil, melted + some for greasing pan
  • 1 teaspoon baking powder
  • 1 teaspoon cinnamon
  • 1/2 teaspoon ginger
  • 1 can full fat coconut milk, refrigerated at least 24 hours
  • damp kitchen towel
  • optional: vanilla extract


Instructions:

1. Line a 13 X 9 inch pan with a silpat or parchment paper. Grease well with coconut oil.

2. Preheat the oven to 375 degrees. Make sure your coconut milk has been refrigerated at least 24 hours at this point.

3. Separate the egg yolks from the egg whites. I love this one because it hangs on the edge of my mixing bowl!

4. Set aside egg yolks.

5. In an electric mixer, whip egg whites until fluffy (3-4 minutes on high).

6. While eggs are whipping, whisk eggs until thickened (about a minute).

7. Add in honey, molasses and melted coconut oil. Mix well.

8. Add in baking powder, cinnamon, and ginger. Mix well.

9. When egg whites are done, add them to the egg yolks and gently fold in. Do not over mix. The batter needs to be fluffy and springy so it is easy to roll.

10. Spread batter evenly onto the greased pan.

11. Put batter in the oven for 11 minutes.

12. While the batter is in the oven, take out coconut milk. Flip the can upside down so that the coconut water drains to the top (you won’t be using the coconut water, but can save it for a smoothie)!

13. Open the can with a can opener and drain off the coconut water.

14. For the whip cream, you can use an electric hand mixer, or a stand mixer (like the egg whites). Whip until fluffy. You can also add in vanilla extract (1-2 tablespoons) or cinnamon for extra flavor! Yummy! Set in the refrigerator until ready to use.

15. When the cake is ready to come out of the oven, take it out and set the timer for 3 minutes. This is how much time it needs to cool.

16. Dampen the towel with some water (not too wet, though).

17. Place tea towel down on the counter. Holding onto the parchment paper edges, carefully flip over the cake onto the towel and gently peel off the Silpat or parchment paper.

18. Carefully and gently, using the tea towel, roll up the cake. The towel will help hold the rolled shape as it cools.

19. Allow to cool completely.

20. When the cake roll has cooled, slowly unroll it (hopefully there will not be any cracking)! I moved mine back to the parchment paper at this point, so that it wasn’t on the towel anymore.

21. Using a spatula, spread out the coconut whip cream, leaving about 1-2 inches around the edges (you’ll use the leftovers for covering the outside of the roll).

22. Roll the cake back up, without the towel this time.

23. Use remaining whip cream to cover the outside of the roll. I also used a fork to drag lightly down the top and the slides to make it look more like a ‘log’.

24. Voila! You have a beautiful Gingerbread Roll, perfect for any party or holiday event - or to enjoy on your own!!


Nutritional Information: Calories: 198 Fiber: 1g  Sugar: 15g


Grain Free Gingerbread Roll

gluten free, paleo

Filed Under: Desserts & Baked Goods ·

Sweet & Sour Muffins

February 20, 2020 · by Meg · Leave a Comment

Sweet & Sour Muffins

​Cranberries are in abundance right now (see my cranberry orange scone recipe or my cranberry orange upside down bread)! I’m actually planning on making a few smoothies with them this week! They can also be sweet or tart, which I really love about them (cherries, too). Full of antioxidents! These gluten free, paleo muffins have both cranberries and blueberries, making them the muffins both a little sweet and a little sour. Delish!


Makes 8 muffins

Ingredients:

  • 1/2 cup coconut flour
  • 1/2 cup coconut oil + more for greasing pan if needed.
  • 3 eggs
  • 1/2 cup blueberries (frozen or fresh)
  • 1/2 cup cranberries (frozen or fresh)
  • 4 tablespoons almond milk
  • 1/4 cup honey or maple syrup
  • 2 teaspoons baking powder
  • 1 teaspoon vanilla extract
  • 1 teaspoon cinnamon
  • 1/2 teaspoon salt


Instructions:

1. Preheat the oven to 400 degrees.

2. If using fresh blueberries and cranberries, rinse them. Dry very well to ensure a fluffy muffin.

3. Mix dry ingredients in a bowl. Set aside.

4. Mix wet ingredients in a bowl.

5. Mix wet ingredients with dry ingredients.

6. Gently fold in cranberries and blueberries.

7. Disperse the batter evenly in 8 cups.

8. Bake in the oven for 20-25 minutes or until knife comes out clean.


Nutritional Information: Calories: 220  Fiber:  3g  Sugar: 10g

Sweet & Sour Muffins

gluten free, paleo

Filed Under: Desserts & Baked Goods ·

Apple Coffee Cake

February 20, 2020 · by Meg · Leave a Comment

Apple Coffee Cake

​ Here I go with desserts again! I think I mentioned before, I think it’s just the cold weather that’s got me baking so much (not so good for my waistline, either)! This dish was inspired from all of those apples. I had actually made this in November, but I had forgotten to post this! Silly me! This cake is yummy, and it’s great for an easy morning breakfast (or just a delicious snack)! We are getting a storm this weekend, so I think I’ll be baking this again as we will stuck inside this weekend!

note: I have used flax seed & water, but you could easy use 3 eggs to make this non-vegan apple coffee cake.


Serves 12

inspired by Against All Grain

Ingredients:

  • 3 cups oat flour
  • 1 cup apples - washed, peeled and chopped (+ 1 cup for top layer if desired)
  • 1/2 cup honey or maple syrup + extra for drizzle
  • 1/4 cup coconut oil, melted + extra for greasing pan
  • 9 tablespoons water
  • 3 tablespoons flax seed
  • 4 tablespoons lemon juice
  • 3 tablespoons slivered almonds
  • 1 teaspoon cinnamon
  • 1 teaspoon vanilla extract
  • 1/2 teaspoon ginger


Instructions:

1. Preheat the oven to 350 degrees.

2. Wash, peel and chop 1 cup of apples (you can also wash, peel and slice apples for topping if you are doing this part).

3. Toss apples in lemon juice and set aside (this will prevent them from browning).

4. Mix oat flour, flax seed, cinnamon and ginger in bowl and set aside.

5. Mix honey, coconut oil, water, and vanilla in another bowl and combine well.

6. Fold wet and dry ingredients together.

7. Gently fold in chopped apples (lemon juice removed).

8. Grease a round cake pan and pour batter in (it will be very thick).

9. For the topping, you can be creative with your sliced apples! I started on the outside of my pan, and worked my way around and around until I got to the middle. Have fun! You can create any kind of design you like!

10. Drizzle almonds and extra maple syrup or honey on top. This will also make the top shiny when it comes out of the oven!

11. Bake for 45-50 minutes or until a toothpick comes out clean.


Nutritional Information:  Calories: 220   Fiber:  4g   Sugar:  14g


Apple Coffee Cake

gluten free, vegan

Filed Under: Desserts & Baked Goods ·

Chocolate Chai Bars

February 20, 2020 · by Meg · Leave a Comment

Chocolate Chai Bars

I’ve been eating a lot of granola and oatmeal lately (one of things my stomach can handle since I’ve been pregnant). I used to make my own all the time… but life got busy, and I just went to my trusty fallback, Two Moms in the Raw (love their goji berry bars). My other favorite bars are Budi Bars. They are amazing, really. But they are also super expensive. While I love supporting these two companies, my budget does not always have room for all of my favorite snack. Budi Bar’s are awesome because they were created in Boston, and many of the Dana Farber patients eat them because they are one of the few things they can stomach while going through cancer treatment. I attemped to recreate my favorite flavor they make, chai. My Mom says they taste pretty similar, so I’m pretty excited about that. Will never be the exact thing, but that’s okay. These come very close and that is satisfying enough!


Makes 5 bars

Ingredients:

  • 1/2 cup chicory root
  • 1/4 cup chai, loose leaf tea
  • 1/4 cup unsweetened coconut
  • 1/4 cup hemp seeds
  • 2 tablespoons chia seeds
  • pinch of cinnamon
  • pinch of ginger
  • 1/4 cup Enjoy Life Chocolate Chips, melted (any kind)
  • 3 tablespoons honey (or more, if you need it, to make them stick)


Instructions

1. Mix chicory root, chai, coconut, hemp seeds, chia seeds, cinnamon and ginger in a bowl.

2. Melt Enjoy Life Chocolate Chips on the stove in a sauce pan on low heat, stirring to keep from burning.

3. Add melted chocolate to the dry bar ingredients. Mix well.

4. Add honey to ingredients, mixing well.

5. At this point, your mix should stick together well enough to mold it into a long rectangle so that you can cut it into small, 6 inch rectangles for easy munching. If it’s not, keep adding more honey, one teaspoon at a time at a time.

6. Bars can be cut into small rectangles (about 6 inches long). Should make 4 bars.

7. Bars do not need to be refrigerated, but can be sealed in an air tight container for 4-5 days.


Nutritional Information: Calories: 180 Fiber: 3g  Sugar:  13g

Chocolate Chai Bars

gluten free, vegan, raw, paleo

Filed Under: Desserts & Baked Goods ·

Gluten Free Starbucks Berry Coffee Cake

February 20, 2020 · by Meg · 2 Comments

Gluten Free Starbucks Berry Coffee Cake

​ When I was in college, and into my first years of working as a teacher (I’m not sure how I figured out how to manage it all), I worked at Starbucks. Good pay, good tips, free coffee, health insurance, 401K. Not too shabby. It was also, however, really hard not to eat junk all the time because of all the delicious drinks and treats they have available for you to eat all the time, any time. You name it, I could eat it or drink it.


Anyways, since I’ve been pregnant, I’ve wanted a lot of things I would not normally eat; bagels, coffee cake, pretty much the entire pastry case at Starbucks. The Reduced Fat Berry Coffee Cake, though, was always one of my favorites when I was working there. And when I was in the other week for a drink, I started thinking about making my own version. With the first ingredient being listed as sugar, the second as wheat, and also things with names I cannot even pronounce (see the rest here), I thought this would be a good start to satisfy my craving. Huge hit with my husband, co-workers and family. Will definitely keep these on muffin rotation in the kitchen. The berries are just soooooo good!


This Recipe is also being submitted as part of the So Delicious Recipe Contest!

Makes 24 mini muffins

Ingredients:

  • 3/4 cup almond flour
  • 3/4 cup coconut flour
  • 1/4 cup coconut oil, melted
  • 1/2 cup honey
  • 4 eggs
  • 4 ounces Plain So Delicious dairy free yogurt
  • 2 teaspoons baking soda
  • 2 teaspoons cinnamon
  • 1/2 cup blueberries, washed
  • 1/2 cup blackberries, washed and sliced
  • 1/2 cup raspberries, washed and sliced

struesel topping (optional)

  • 1/2 cup raw walnuts
  • 3 tablespoons honey
  • 1 teaspoon cinnamon


Instructions:

1. Preheat oven to 350 degrees.

2. Mix wet ingredients.

3 Mix dry ingredients.

4. Gently fold in all washed berries.

5. Distribute batter evenly in greased (or lined) mini muffin pans

6. Mix struesel topping if desired (& add a little topping to each muffin).

7. Bake for 30 minutes or until a toothpick comes out clean.


Nutritional Information (one muffin):

Calories: 92​   Fiber: 2g    Sugar: 6g

Topping Calories: 36   Fiber: 1g   Sugar: 3g


Gluten Free Starbucks Berry Coffee Cake

gluten free, paleo

Filed Under: Desserts & Baked Goods ·

  • « Previous Page
  • 1
  • 2
  • 3
  • 4
  • 5
  • …
  • 9
  • Next Page »

Subscribe via Email

Connect with Veggie Staples

  • Email
  • Facebook
  • Instagram
  • Pinterest
  • RSS
  • Twitter

Meet Meg

Hi! My name is Meg, owner and blog writer for Veggie Staples! Thanks for stopping by! I love creating healthy, yummy recipes for everyone to enjoy (meat and non-meat eaters alike)! For more information check out my About Me page. Read More…

Search Recipes

FitFluential Is Fitness Found
myTaste.com

Copyright © 2019 | Innovative by The Pixelista | Built on the Genesis Framework