Veggie Staples

dairy free, gluten free, refined sugar free, plant based recipes

  • Home
  • About
  • Recipe Index
    • Appetizers & Sides
    • Breakfast
    • Desserts & Baked Goods
    • Entrees
    • Smoothies & Drinks
  • Health & Wellness
    • Health & Wellness
    • Book Reviews
    • Weight Loss
    • Workouts

Gluten Free High Protein Pumpkin Cranberry Mug Cake

November 9, 2020 · by Meg · Leave a Comment

Gluten Free High Protein Pumpkin Cranberry Mug Cake

IMG_3503

I know we are well on our way into peppermint and gingerbread season, but pumpkin will always be my favorite. I recently teamed up with Sun Warrior, a company that makes delicious, gluten free, vegan, non GMO, no soy protein powders and supplements! I love their protein powder and was excited to get in the kitchen to create some recipes using their products!

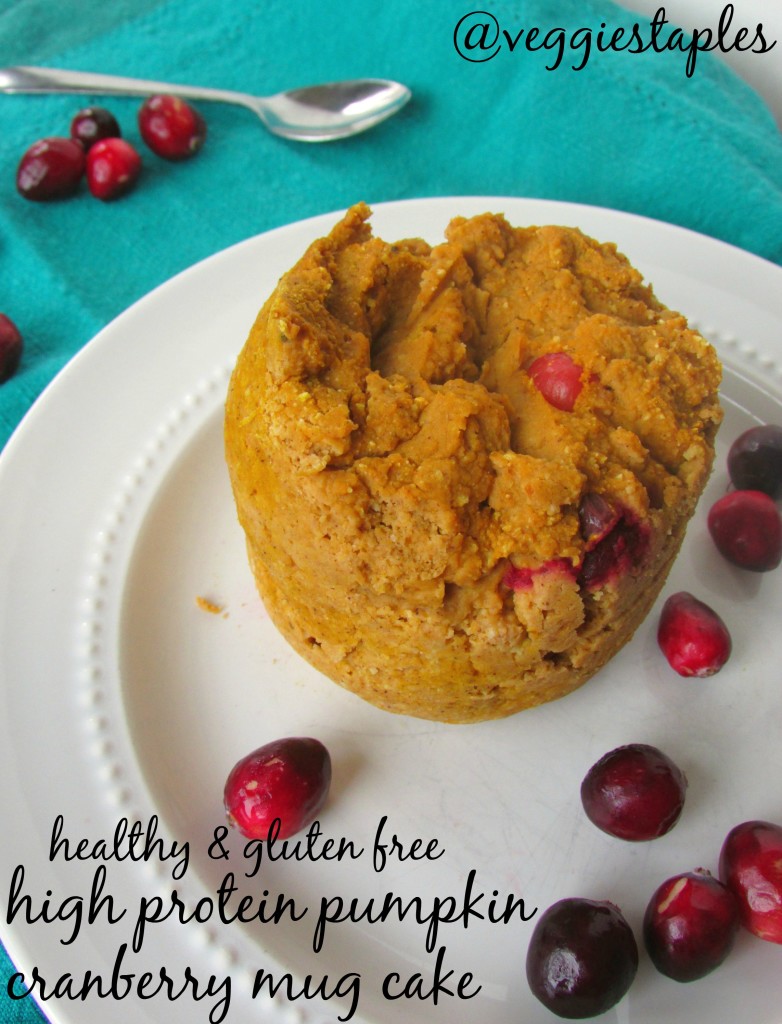
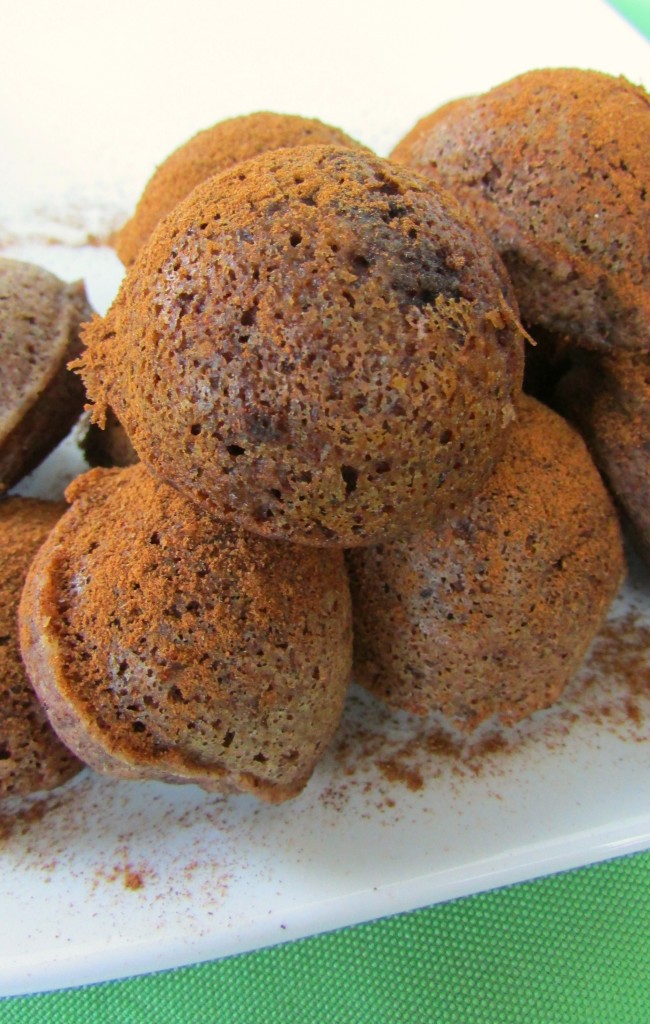
One thing I haven’t yet made my for my blog, but love and eat all the time are mug cakes! Sun Warrior gave me the perfect opportunity to incorporate their awesome products into a mug cake. Like I said, I’m still wayyyyyy into the pumpkin, so with the fresh cranberries I just picked up at the store, pumpkin cranberry it was! (You could also swap out the cranberries for chocolate chips). This is easy to throw together, and it’s a super healthy treat with almost 30 grams of protein packed into it, between the protein powder, egg whites, pumpkin & coconut flour! How could you go wrong? I really hope that you enjoy this recipe as much as I do, and give Sun Warrior products a try, they truly are one of my favorite protein powders out there!

IMG_1072

Print
Gluten Free High Protein Pumpkin Cranberry Mug Cake
Author: Meg Staples
Recipe type: Mug Cake
Prep time:  5 mins
Cook time:  3 mins
Total time:  8 mins
Serves: 1 mug cake
 
Ingredients
  • ½ cup pumpkin puree
  • ¼ cup fresh cranberries
  • 28 grams (one scoop) Sunwarrior Vanilla Protein Powder
  • 3 tablespoons unsweetened almond milk
  • 3 tablespoons liquid egg whites
  • 1 tablespoon coconut flour
  • 1 heaping teaspoon pumpkin pie spice
  • ⅛ teaspoon baking powder
  • *optional: ½ teaspoon stevia for extra sweeteness
Instructions
  1. Mix all ingredients together in a bowl
  2. Grease the inside of the mug you are going to use (I like using a tiny bit of coconut oil)
  3. Add ingredients to mug and heat on high in the microwave (3-4 minutes)
  4. Enjoy immediately!
3.3.2019


glutenfreepumpkinmugcake

Filed Under: Desserts & Baked Goods · Tagged: cranberry, dessert, easy, gluten free, healthy, high protein, mug cake, pumpkin, snack, sun warrior, weight loss

Protein Packed Apple Snack Bites

November 6, 2020 · by Meg · Leave a Comment

Protein Packed Apple Snack Bites

IMG_3485

If there is ever way to pack in some extra protein for a snack, I’m looking for it. As someone who doesn’t eat much more than fish, I add it in when I can. Have you ever heard of Manitoba Hemp Hearts? Manitoba is a company that makes hemp hearts, an amazing plant based protein made from hemp seeds! I love using them in everything from baking to smoothies, to give food a subtly nutty flavor or an extra crunch! Yum! Each serving has 10 grams of protein, and 10 grams of Omega 3 & 6! Amazing!

IMG_1005

As a mom of a 1 year old, I’ve always got snacks with me. Between my husband and my daughter, someone is always hungry (or hungry). After making your own almond butter (super easy and inexpensive, directions below), swirl in some hemp seeds to make it crunchy and add more protein! And then dip your apple slices in more hemp hearts once you slather them in almond butter too! This is a really awesome snack packed full of protein that everyone in my whole family can munch on while we’re out! Everyone wins and we’re all eating something healthy!

Print
Protein Packed Apple Snack Bites
Author: Meg Staples
Recipe type: snack
Prep time:  20 mins
Total time:  20 mins
Serves: 3 apple snacks
 
Ingredients
  • 3 cups raw almonds
  • *optional: 2 tablespoons of honey or oil for sweetness or creaminess
  • 4 tablespoons Manitoba Hemp Hearts
  • 3 apples, washed and sliced
Instructions
  1. If making your own almond butter, blend almonds in blender or food processor until smooth. Stopping as needs to push down what has stuck to the sides with a spatula or spoon (blend in honey, oil or extra hemp seeds if desired)
  2. Once apples are washed and sliced, dip in almond butter and roll them into the hemp seeds (1-2 tablespoons at a time)
  3. I doubt the snacks will last 24 hours (in the refrigerator) but you can try!
  4. *recommended to store your almond butter in the fridge!
3.3.2019

crunchyappleproteinsnack

Filed Under: Appetizers & Sides · Tagged: almond butter, apples, easy, egg free, gluten free, grain free, healthy, hemp, hemp hearts, kid friendly, no bake, on the go, paleo, protein, snack, vegan, vegetarian, weight loss, yeast free

Gluten Free Orange Carrot Ginger Muffins

August 18, 2020 · by Meg · 1 Comment

Gluten Free Orange Carrot Ginger Muffins

IMG_3374

My husband’s favorite cake is carrot (okay, maybe second to chocolate). I had him test these out with the new Enjoy Life Muffin Mix that I used to create these Gluten Free Orange Carrot Ginger Muffins. All I have to say about his reaction is Winner, Winner, Chicken Dinner!! His eyes lit up when he took a bite of these!

They are super easy to put together, and they are just to die for! They are really great for a quick breakfast, but also for an awesome morning or afternoon snack. My daughter (who just turned 1), also devoured these, so kid friendly, especially because all those carrots are hidden!! The ginger makes is a little zesty, the orange makes it a little sweet - the perfect balance! Well, what are you waiting for, get to your kitchen to make these muffins!!

Print
Gluten Free Orange Carrot Ginger Muffins
Author: Meg Staples
Recipe type: Muffin
Prep time:  15 mins
Cook time:  15 mins
Total time:  30 mins
Serves: 9 muffins
 
Ingredients
  • 1½ cups Enjoy Life Muffin Mix (as prepared, I made mine with coconut oil)
  • ½ cup finely shredded carrots (you can use a cheese grater or a food processor)
  • 1 orange, zested
  • ¼ cup fresh squeezed orange juice
  • 2 teaspoons grated ginger (or dried ginger)
  • ½ teaspoon cinnamon
  • *extra coconut oil for greasing muffin tin or muffin liners
Instructions
  1. Preheat the oven to 350 degrees
  2. Prepare the muffin mix (as directed)
  3. Shred carrots with a cheese grater or food processor
  4. Place shredded carrots in a bowl and squeeze & zest the orange, adding it to the bowl of carrots
  5. Grate ginger & add to the carrots
  6. Add cinnamon
  7. Add the muffin mix to the carrot mixture, mixing until well combined
  8. Divide the mixture evenly among 9 muffin tins
  9. Bake for 15 minutes or until a toothpick or knife comes clean
  10. Allow to cool before devouring!
3.3.2019


glutenfreeorangecarrotgingermuffins

Filed Under: Breakfast, Desserts & Baked Goods · Tagged: allergen free, appetizer, breakfast, carrot, cinnamon, dairy free, dessert, easy, enjoy life, ginger, gluten free, healthy, muffin, orange, snack, treat, vegetarian, weight loss

21 DSD Cocoa Banana Nut Muffins

May 18, 2020 · by Meg · 3 Comments

I’m still doing the whole 21 Sugar Detox thing! I actually cheated a little bit yesterday after my race. I completed a marathon relay with 4 other great woman on my team, and nine groups of Mom’s Run This Town. SO much fun & I had a blast. Here’s a photo of me & Zoey when I got home. She liked playing with the medal, of course!

So the day was outstanding, except for the fact that I ate some candied walnuts, a slice of cheese pizza and a donut. And then I proceeded to have a pounding headache until I went to bed despite guzzling about 20 million gallons of water. So while I normally feel crappy after eating a dairy product, this one really hit home for me. This whole not eating any sugar thing is working. And clearly making me feel a lot better - and I have lost 4 pounds. So thank you 21 Day Sugar Detox Books & Diane Sanfilippo!

These cocoa banana nut muffins are 21 DSD friendly, so I need to let you know in advance that they are not sweet! repeat: not sweet! I put this recipe together specifically to have something muffin and bread like, because that is a no-no, and going into week 3 I needed something. They definitely satisfy the bread like quality I was going for, but with no sugar involved. The banana and almond butter provide a hint of that, but that’s it, for the most part. Anyways, you’ve been warned! Do not expect otherwise - and happy detoxing!!

Print
21 DSD Cocoa Banana Nut Muffins
Author: Meg Staples
Recipe type: Muffin
Prep time:  10 mins
Cook time:  20 mins
Total time:  30 mins
Serves: 12 muffins
 
Ingredients
  • 1 cup almond flour
  • ¾ cup almond or coconut milk
  • 2 green tipped bananas
  • ¼ cup almond butter
  • ⅔ cup slivered almonds
  • ⅓ cup raw cocao nibs
  • 2 eggs
  • 1 tablespoon cinnamon
  • 1 teaspoon vanilla extract
  • 1 teaspoon baking soda
Instructions
  1. Preheat the oven to 350 degrees
  2. Line or grease muffin tins (with coconut oil or muffin liners)
  3. Put all ingredients except almonds and cocao nibs in the blender or food processor, buzz until smooth
  4. Pour blender contents in a bowl, gently fold in almonds & nibs
  5. Distribute equally among 12 muffin tins
  6. Bake 18-22 minutes or until a toothpick comes out clean
  7. Remove from oven & allow to cool before eating
3.2.2019

cocoabanananut21dsdmuffins

Filed Under: Breakfast, Desserts & Baked Goods · Tagged: 21 day sugar detox, 21 DSD, allergen free, almond butter, banana, breakfast, chocolate, cinnamon, gluten free, grain free, healthy, muffin, paleo, snack, sugar free, vegetarian, weight loss, yeast free

Springtime Vegetable Pot Pie

May 12, 2020 · by Meg · Leave a Comment

Springtime Vegetable Pot Pie

IMG_3069

This isn’t 21 DSD friendly (something I am doing right now, more recipe for that soon) but I made 4 of these Spring Vegetable Pot Pie’s before I went on the detox and stuck them in the freezer (not after having one for my lunch the next few days, of course). I know they will be great go to’s for dinner at the end of the school year with all of the hustle and bustle going on. I opted to make 2 mini pot pies, but you could make one big one if you were feeding a family (double the recipe for 2 or 4, to store in the freezer for later). It’s easy because you throw all the veggies you’d like into a pan with some flour & stock & voila! You have your filling! The crust is a simple recipe I use from The Coconut Mama (no need to reinvent the wheel!). These spring vegetable pot pies are really easy to make and roll out for the top and the bottom of the pies. You can switch up your own veggies, add chicken if you have meat eaters on your hands, etc. Either way it’s a really easy dinner & even more easy to make extra back ups for freezing! Enjoy!

Print
Springtime Vegetable Pot Pie
Author: Meg Staples
Recipe type: Vegetable Pot Pie
Prep time:  20 mins
Cook time:  20 mins
Total time:  40 mins
Serves: 1 pot pie
 
Ingredients
  • 1 small onion, peeled & chopped roughly chopped
  • 2 large carrots, peeled, washed & chopped
  • 1 cup string beans, washed and chopped
  • 2 cups corn from corn on the cob
  • ¼ cup coconut flour
  • 1½ cups vegetable stock
  • ½ cup non-dairy milk
  • ⅔ cup frozen sweet peas
  • 1 tablespoon thyme
  • 1 tablespoon oregano
  • 1 tablespoon rosemary
  • 1 tablespoon coconut oil for cooking veggies
  • salt & pepper to taste
Instructions
  1. Wash & chop all veggies
  2. Prepare pie crust *see recipe for The Coconut Mama’s Coconut Flour Pie Crust above*
  3. In a large pan, heat the coconut oil on medium heat until melted
  4. Add all of the veggies & cook until barely tender
  5. Stir in milk, vegetable stock, coconut flour & spices
  6. Mix until flour is dissolved
  7. Reduce heat & allow to cook for another 5-7 minutes
  8. Change oven temperature from 400 to 375 degrees
  9. Pour filling into the bottom of the pie crust (or 2 small pie pans if desired)
  10. Roll out the remaining pie crust to cover the top
  11. Poke four small slits in the top to allow steam to come out
  12. Spread extra melted coconut oil (1 tablespoons) for a more golden crust
  13. Bake for 17-20 minutes or until edges brown
  14. Enjoy!
3.2.2019

glutenfreepaleovegetablepotpie

Filed Under: Entrees · Tagged: allergen free, coconut flour, dairy free, easy, easy dinner, gluten free, grain free, healthy, nightshade free, nut free, paleo, pot pie, vegetables, vegetarian, veggies, weight loss, yeast free

Almond Butter Banana Yogurt Parfaits

May 7, 2020 · by Meg · 1 Comment

Almond Butter Banana Yogurt Parfaits

IMG_3037

So on Monday May 4th, I started the 21 Day Sugar Detox (level one). Great book by a great author, Diane Sanfilippo. I don’t eat a lot of sugar to begin with (a little stevia in my coffee & some dark chocolate, usually after dinner) but I am 13 pounds away from my goal weight (pre Zoey) and I have not lost but a mere few pounds in the past month. I’m hoping this helps jump start whatever is making me plateau despite HIIT workouts, lifting weights, and macro/calorie counting.

I’m starting with Level 1 this go around (there is also level 2 & 3). Level one includes plain yogurt, green bananas & green apples in moderation. These are my go to fruits anyways, so score! This almond butter banana yogurt parfait is a really great snack that is incredibly filling. It’s really easy and I made them in small 8 ounce mason jars I picked up at Target (find the same ones here) so I had go to snacks for the week! You can layer with more bananas or almonds (cashews and peanuts are no-no’s, walnuts, pecans & seeds are all okay). What is your favorite low sugar/no sugar snack?

Print
Almond Butter Banana Yogurt Parfaits
Author: Meg Staples
Recipe type: snack
Prep time:  5 mins
Total time:  5 mins
Serves: 1 jar
 
Ingredients
  • 5 ounces plain non dairy yogurt (lowest sugar content possible)
  • 2 ounces banana, sliced
  • 1 tablespoon cinnamon
  • 2 tablespoons slivered almonds
  • 1 tablespoon almond butter
Instructions
  1. Place half container (2.5 ounces) into the bottom of the mason jar
  2. Add 1 ounce banana, 1 tablespoon slivered almonds, almond butter & ½ tablespoon cinnamon on top of the yogurt
  3. Add the rest of the yogurt on top of ingredients
  4. Top with one tablespoon cinnamon & 1 tablespoon slivered almonds
  5. Place top on mason jar & store in the fridge up to 5 days or enjoy immediately!
3.2.2019

veganpaleoglutenfreealmondbutteryogurtparfaits

Filed Under: Breakfast · Tagged: 21 day sugar detox, allergen free, almond butter, almonds, banana, breakfast, cinnamon, dairy free, egg free, gluten free, healthy, non dairy, paleo, protein, snack, vegan, vegetarian, weight loss, yogurt

Cinnamon Vanilla Donut Holes

May 4, 2020 · by Meg · Leave a Comment

Cinnamon Vanilla Donut Holes

IMG_2995
Let’s talk more donut holes. (see my recipe for the triple chocolate ones here). This will be the last sweet treat recipe for a while because today I started the 21 Day Sugar Detox created by Diane Sanfilippo. She’s also the author of Practical Paleo & Mediterranean Paleo Cooking! I have plateaued and haven’t really lost any weight in the past month, and I’m thinking I need a reset. I am super good about eating a clean diet, but I thought I’d try something new. We are talking eliminating every fruit or food that has sugar (or fake sugar) except for green bananas and green apples. I don’t eat a lot of fruit in general, so I’m hoping that this might not be too bad, pending the fact that at some point during the day I usually have some dark chocolate. 21 days isn’t too long, right?

These cinnamon vanilla donut holes are actually on the less sweet side, my husband didn’t like them as much as the chocolate (of course). But I thought they were awesome & would definitely eat these as a snack all. the. time.! And of course they are paleo and gluten free, so go make these - what are you waiting for?!!

Print
Cinnamon Vanilla Donut Holes
Author: Meg Staples
Recipe type: Snack
Prep time:  5 mins
Cook time:  8 mins
Total time:  13 mins
Serves: 15 donut holes
 
Ingredients
  • ¾ cup almond flour
  • ¼ cup unsweetened almond milk
  • ¼ cup coconut sugar, honey crystals, or stevia/truvia
  • ¼ cup coconut oil, melted
  • 1 egg
  • 2 tablespoons vanilla extract
  • 1 tablespoon cinnamon + more for dusting
  • ½ teaspoon baking soda
Instructions
  1. Preheat the oven to 325 degrees if using a cake pop mold, or plug in your cake pop maker
  2. Beat egg & coconut sugar together in a bowl
  3. Add egg, vanilla extract, almond milk and coconut oil to egg/sugar mixture & mix well
  4. In a separate bowl, sift cinnamon, baking soda & almond flour together
  5. Add the flour mixture to the wet mixture & mix well
  6. Add batter to the mold or cake pop maker (I find you get the most rounded shape from overfilling the mold a little bit)
  7. Bake for 10 minutes in the oven, or 7-8 minutes in a cake pop maker
  8. Repeat for second batch (you should get 15-18 donut holes)
  9. When cool, remove from cake pop mold & dust with extra cinnamon
3.2.2019


paleoglutenfreecinnamondonutholes

Filed Under: Desserts & Baked Goods · Tagged: allergen free, appetizer, breakfast, cinnamon, dairy free, dessert, donut holes, gluten free, healthy, paleo, snack, treat, vanilla, vegetarian, weight loss, yeast free

Roasted Lemon Cayenne Cashews

April 16, 2020 · by Meg · Leave a Comment

Roasted Lemon Cayenne Cashews

More snacks, anyone? I love my nut & seed bars, but I’ve been eating them for 3 weeks & I need a little break! Last week I posted a recipe for roasted cinnamon vanilla cashews, which are more dessert like! This week, I thought I’d bring you something savory, like these great roasted lemon cayenne cashews! Do you like roasted nuts? One of my favorite things to do in the fall is roast pumpkin seeds in sea salt from all our pumpkins (find that recipe here)! If you are allergic to cashews, or just don’t like them, you can always swap them out for almonds, or even seeds instead, using the same method. Do you ever soak your nuts in any extracts? What do you use and what is your favorite? Sweet or savory?

Print
Roasted Lemon Cayenne Cashews
Author: Meg Staples
Recipe type: snack
Prep time:  8 hours
Cook time:  3 hours
Total time:  11 hours
Serves: 4 servings
 
Ingredients
  • 1 cup raw cashews
  • ½ cup lemon juice
  • ½ cup water
  • 1 tablespoon cayenne (+ more if you like them extra spicy)
Instructions
  1. Place cashews in a bowl overnight to soak in ½ cup lemon juice & ½ cup water
  2. *add cayenne to water mixture if you like it spicy!
  3. In the morning, spread nuts out on a paper towel to thoroughly dry (a few hours)
  4. Preheat the oven to 200 degrees
  5. Place nuts on a silpat and spread out evenly
  6. Sprinkle with 1 tablespoon or more of cayenne
  7. Roast in oven for 3 hours
3.2.2019

veganroastedlemoncayennecashews

Filed Under: Appetizers & Sides · Tagged: allergen free, appetizer, cashews, cayenne, dairy free, egg free, gluten free, healthy, lemon, nuts, paleo, snack, snacks, vegan, vegetarian, weight loss, yeast free

Roasted Cinnamon Vanilla Cashews

April 9, 2020 · by Meg · 8 Comments

Roasted Cinnamon Vanilla Cashews

Do you need new snack recipe ideas? Per the request of followers & friends, I’m still on a mission to get you more snack recipes! These roasted cinnamon vanilla cashews are easy, but take a long time in the oven (and are totally worth it). I’m tempted to say a dehydrator might work, but I haven’t tested it yet, so I can’t be sure! These require you to soak, dry, and then bake for a few hours at low temp to get crunchy. But who doesn’t love the sweet combination of cinnamon and vanilla? Do you love the smell of roasted nuts like I do? It makes me think of my days living in Boston and New York City with the street vendors. Delicious! Although a little bit time consuming, the end result is magical! Feel free to double, triple or even quadruple this roasted cinnamon vanilla cashew recipe - or use almonds!

Print
Roasted Cinnamon Vanilla Cashews
Author: Meg Staples
Recipe type: Snack
Prep time:  5 mins
Cook time:  3 hours
Total time:  3 hours 5 mins
Serves: 4 servings
 
Ingredients
  • 1 cup raw cashews or almonds
  • ½ cup pure vanilla extract
  • ½ cup water
  • 2 tablespoons cinnamon (or more, if you like)
Instructions
  1. Place cashews in a bowl overnight to soak in ½ cup vanilla extract & ½ cup water
  2. *add cinnamon to water mixture if you like extra cinnamon!
  3. In the morning, spread nuts out on a paper towel to thoroughly dry (a few hours)
  4. Preheat the oven to 200 degrees
  5. Place nuts on a silpat and spread out evenly
  6. *Sprinkle with 2 tablespoons (or more) of cinnamon
  7. Roast in oven for 3 hours
  8. Allow to cool before serving
3.2.2019

veganroastedcinnamonvanillacashews

Filed Under: Appetizers & Sides · Tagged: allergen free, almonds, appetizer, cashews, cinnamon, egg free, fitness, gluten free, healthy, nuts, paleo, side dish, snack, vanilla, vegan, weight loss, yeast free

Inspiralized Cookbook & Coupons Giveaway

April 7, 2020 · by Meg · 1 Comment

I think one of my favorite cooking items that has come into kitchens in the past few years has been the spiralizer. Have you ever heard of one? If not, get to it! They are the best! You can make almost any vegetable into noodles, which is much healthier than pasta and you can have lots more for the same amount of calories! My personal favorite is sweet potato, but you can use zucchini, white potato, carrots. Pretty much anything. They really are just awesome. They can also turn a salad into something a little more fancy, because you can spiralize cucumbers!

Ali Maffuci has teamed up with TuttoRosso Tomatoes and they are giving away lots of great prizes every week! You can enter for your chance to win a copy of Ali’s new book Inspiralized, and then head over to TuttoRosso’s website to win one of her Spiralizers, aprons & other awesome kitchen gadgets! Enter to win your copy of the new Inspiralized Cookbook & Free Product Coupons for Tuttorosso Tomato products below the recipe! Good luck! (and if you don’t win, I highly suggest buying the book anyways!)

Today I am sharing an amazing recipe for Al Fresco Zucchini Pasta Salad! Really delicious & super easy to make! I’ll also bet that no one would ever believe that this isn’t pasta!!


Print
Inspiralized Cookbook & Coupons Giveaway
Author: Tuttorosso Tomatoes
Recipe type: Entree
Cuisine: Pasta Salad
 
Ingredients
  • 1 28 ounce can tuttorosso dice tomatoes, drained
  • 1 medium yellow bell pepper
  • 3 medium zucchini, blade B, noodles trimmed
  • 1½ cups fresh broccoli florets
  • 1 large carrot, peeled, blade C, noodles trimmed
  • ¼ cup white wine vinegar
  • 2 tablespoons extra virgin olive oil
  • 1 teaspoon italian seasoning
  • 1 teaspoon dijon mustard
  • ⅛ teaspoon garlic powder
  • salt & pepper to taste
Instructions
  1. Bring a large saucepan filled halfway with water and a pinch of salt to boil
  2. Add broccoli and carrots and cook for 3 minutes
  3. Drain and rinse broccoli and carrots with cold water to stop cooking
  4. Combine vinegar, olive oil, italian seasoning, mustard, salt, black pepper, and garlic powder to a screw top jar
  5. Cover mixture and shake well
  6. In a large bowl, combine zucchini noodles, broccoli, carrots, diced tomatoes and yellow bell pepper
  7. Shake dressing and pour over zucchini pasta mixture
  8. Toss gently to coat
Nutrition Information
Calories: 111 Fat: 5g Trans fat: 0 Carbohydrates: 14g Sodium: 254mg Fiber: 4g Protein: 4g Cholesterol: 0mg
3.2.2019


a Rafflecopter giveaway

Filed Under: Appetizers & Sides, Entrees · Tagged: broccoli, carrots, entree, gluten free, healthy, inspiralize, noodles, paleo, pasta salad, raw, side dish, spiralizer, tomatoes, tuttorosso, vegan, weight loss, zoodles

  • 1
  • 2
  • Next Page »

Subscribe via Email

Connect with Veggie Staples

  • Email
  • Facebook
  • Instagram
  • Pinterest
  • RSS
  • Twitter

Meet Meg

Hi! My name is Meg, owner and blog writer for Veggie Staples! Thanks for stopping by! I love creating healthy, yummy recipes for everyone to enjoy (meat and non-meat eaters alike)! For more information check out my About Me page. Read More…

Search Recipes

FitFluential Is Fitness Found
myTaste.com

Copyright © 2019 | Innovative by The Pixelista | Built on the Genesis Framework