Veggie Staples

dairy free, gluten free, refined sugar free, plant based recipes

  • Home
  • About
  • Recipe Index
    • Appetizers & Sides
    • Breakfast
    • Desserts & Baked Goods
    • Entrees
    • Smoothies & Drinks
  • Health & Wellness
    • Health & Wellness
    • Book Reviews
    • Weight Loss
    • Workouts

Protein Packed Apple Snack Bites

November 6, 2020 · by Meg · Leave a Comment

Protein Packed Apple Snack Bites

IMG_3485

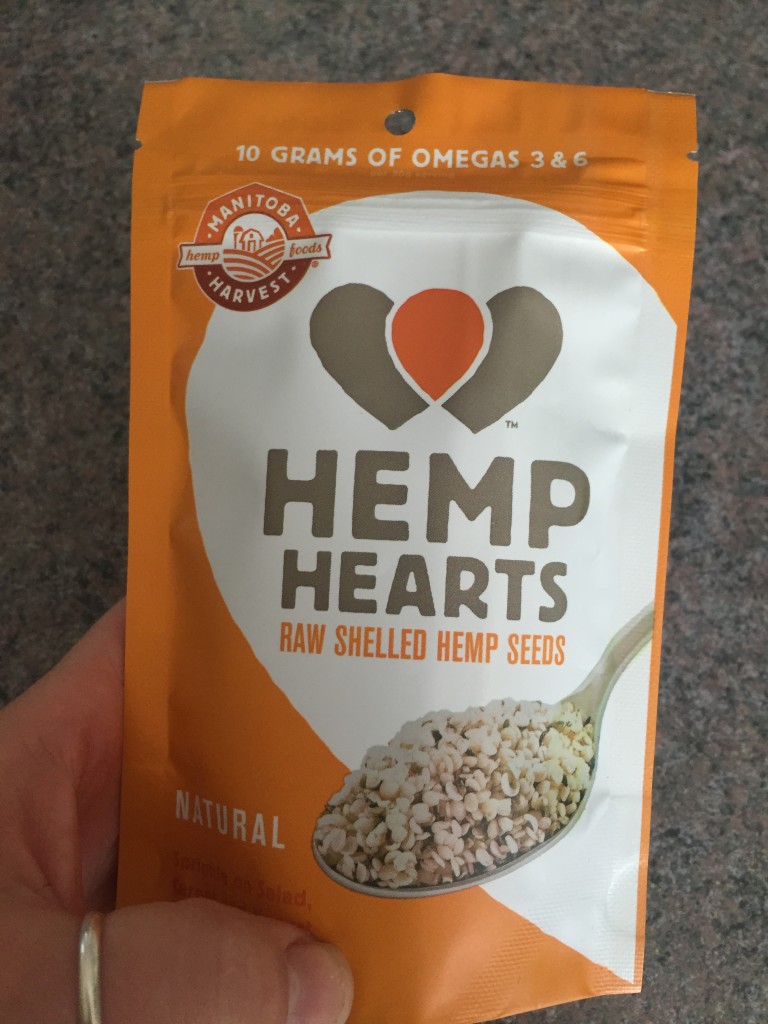
If there is ever way to pack in some extra protein for a snack, I’m looking for it. As someone who doesn’t eat much more than fish, I add it in when I can. Have you ever heard of Manitoba Hemp Hearts? Manitoba is a company that makes hemp hearts, an amazing plant based protein made from hemp seeds! I love using them in everything from baking to smoothies, to give food a subtly nutty flavor or an extra crunch! Yum! Each serving has 10 grams of protein, and 10 grams of Omega 3 & 6! Amazing!

IMG_1005

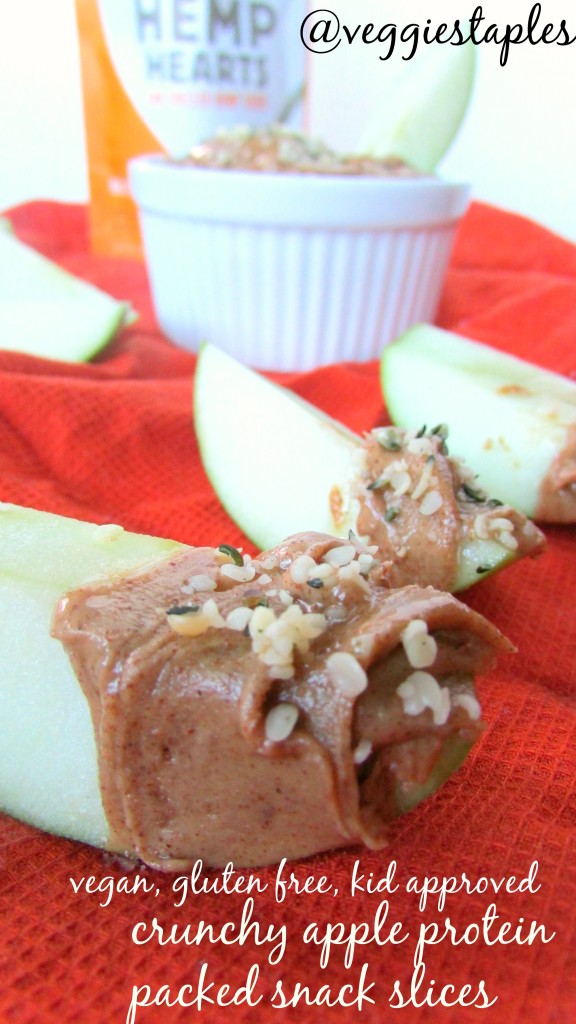
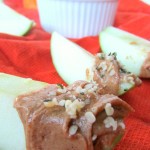
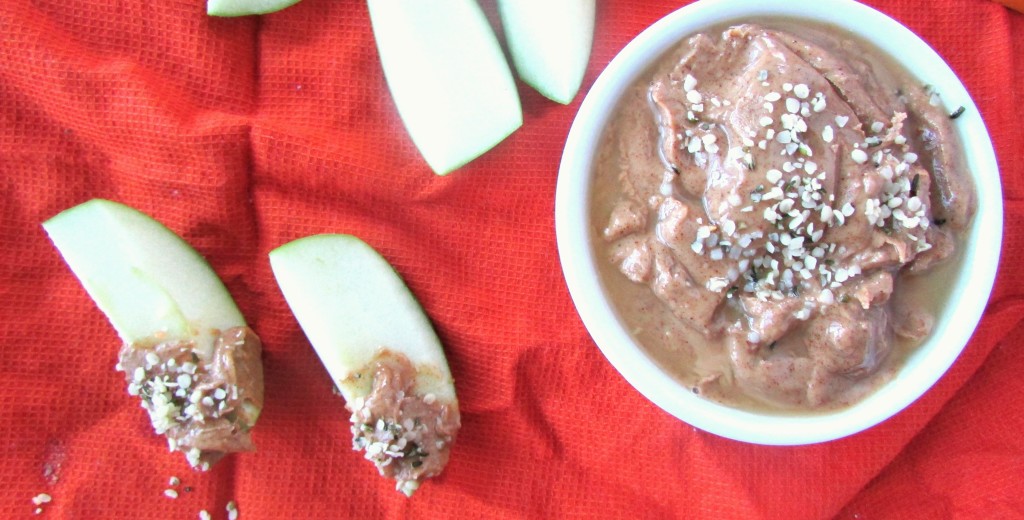
As a mom of a 1 year old, I’ve always got snacks with me. Between my husband and my daughter, someone is always hungry (or hungry). After making your own almond butter (super easy and inexpensive, directions below), swirl in some hemp seeds to make it crunchy and add more protein! And then dip your apple slices in more hemp hearts once you slather them in almond butter too! This is a really awesome snack packed full of protein that everyone in my whole family can munch on while we’re out! Everyone wins and we’re all eating something healthy!

Print
Protein Packed Apple Snack Bites
Author: Meg Staples
Recipe type: snack
Prep time:  20 mins
Total time:  20 mins
Serves: 3 apple snacks
 
Ingredients
  • 3 cups raw almonds
  • *optional: 2 tablespoons of honey or oil for sweetness or creaminess
  • 4 tablespoons Manitoba Hemp Hearts
  • 3 apples, washed and sliced
Instructions
  1. If making your own almond butter, blend almonds in blender or food processor until smooth. Stopping as needs to push down what has stuck to the sides with a spatula or spoon (blend in honey, oil or extra hemp seeds if desired)
  2. Once apples are washed and sliced, dip in almond butter and roll them into the hemp seeds (1-2 tablespoons at a time)
  3. I doubt the snacks will last 24 hours (in the refrigerator) but you can try!
  4. *recommended to store your almond butter in the fridge!
3.3.2019

crunchyappleproteinsnack

Filed Under: Appetizers & Sides · Tagged: almond butter, apples, easy, egg free, gluten free, grain free, healthy, hemp, hemp hearts, kid friendly, no bake, on the go, paleo, protein, snack, vegan, vegetarian, weight loss, yeast free

Pumpkin Pie Pancake Bites

October 26, 2020 · by Meg · Leave a Comment

Pumpkin Pie Pancake Bites

IMG_3471

Okay, you all know how much I love pumpkin, right? Well, my newest obsession since training for a marathon is pancakes. Something so easy and simple yet so delicious after running 18, 20, or 22 miles! Especially with blueberries! Well I’ve recently found Fit Body Bakery High Protein Pancake Mix! Fit Body Bakery is dedicated to helping people meet their health and fitness goals in delicious ways. The mixes are packed with 6g+ protein per serving (11g for the pancake mix, more if you use egg whites instead of eggs!!) to satisfy hunger and keep you going all day long. The mixes are sweetened with coconut sugar and stevia, and made with 100% gluten free whole grains our mixes have no preservatives or artificial ingredients! Score all around! These pumpkin pie pancake bites are a healthy post run breakfast and something I can feel good about eating and feeding Zoey for her equally as bad pancake addiction! (and that recurring theme of pumpkin lately….) These are pumpkin pie snacks to eat anytime!

Want to try Fit Body Bakery and all of their awesome baking mixes?! Use Code SP15 for 15% off at FitBodyBakery, Expires 11/30/15

IMG_0660


Print
Pumpkin Pie Pancake Bites
Author: Meg Staples
Recipe type: Pumpkin Pie Pancake Bites
Cuisine: Breakfast
Prep time:  20 mins
Cook time:  20 mins
Total time:  40 mins
Serves: 8 pancake bites
 
Ingredients
  • Fit Body Bakery Pancake Mix (you need eggs or egg whites & milk)
  • 1 egg
  • 1 cup fresh pumpkin puree
  • 3 tablespoons non dairy milk (I used almond)
  • 1 tablespoon stevia or coconut sugar
  • ½ tablespoon all purpose gluten free flour
  • ½ teaspoon vanilla
  • coconut oil for greasing muffin tins
  • Cranberries for garnish (optional)
Instructions
  1. Create pancake mixture and make pancake from Fit Body Bakery box as instructed, set pancakes aside for baking (I got 8 pancakes out of one batch)
  2. Preheat the oven to 375 degrees
  3. Combine all ingredients in a bowl and mix well
  4. Grease muffin cups slightly with coconut oil
  5. Press pancakes into bottom of the muffin tin being careful not to rip them
  6. Place 1-2 tablespoons of the pumpkin mixture into each pancake depending on the sizes of the pancake you made
  7. optional: ⅔ cranberries on top of each pancake for garnish
  8. Place pancake bites in the oven for 20-25 minutes or until a toothpick comes out clean in the middle of the pumpkin pie mixtures
  9. Best if enjoyed warm!
3.3.2019

glutenfreepumpkinpiepancakebites


Filed Under: Appetizers & Sides, Breakfast, Uncategorized · Tagged: breakfast, cranberries, easy snack, fit body bakery, gluten free, healthy, healthy snack, pancake bites, pumpkin, pumpkin pie, snack, vegetarian, yeast free

Easy Gluten Free Banana Pumpkin Muffins

September 23, 2020 · by Meg · Leave a Comment

Easy Gluten Free Banana Pumpkin Muffins

IMG_3402

Well fall has finally rolled into town. Temps down in the 40’s at night, high 60’s & low 70’s during the day. I am in the mood to bake again. 90 degree temps until the 3rd week in September + being back at school +  marathon training = not really wanting to be in the kitchen (and no time). So sorry for the lack of blog posts. Now that things have settled into a routine, and marathon training is tapering, I’m hoping to get back into the blogging routine. I miss it, and I hope you’ve missed me too! Summer was hectic (lots of traveling) so I decided to take a little break from Veggie Staples, although I feel like I need a vacation from all of my vacation traveling! Do you ever feel like that sometimes?

Well along with fall, pumpkin season is also back in full swing (and anyone that knows me knows I love my pumpkin). I had some mushy bananas in the bowl on the counter so I decided to whip up some pumpkin banana muffins - Zoey was into them! I love that she eats ‘regular’ food now, and I can make food or other treats like these muffins that she can eat! I made these for a baby shower - also a big hit! I know you will love them too!

Print
Easy Gluten Free Banana Pumpkin Muffins
Author: Meg Staples
Recipe type: Muffin
Prep time:  10 mins
Cook time:  20 mins
Total time:  30 mins
Serves: 8 muffins
 
Ingredients
  • 1 very ripe banana
  • ¾ cup pureed pumpkin
  • ¾ cup almond flour
  • 2 eggs
  • 2-3 tablespoons pumpkin pie spice (depending on how big of a pumpkin fanatic you are!!)
  • 1 tablespoon coconut oil, melted
  • 3 teaspoons baking powder
  • 2 teaspoons cinnamon
  • optional: 2-4 tablespoons stevia, or enjoy life chocolate chips!
Instructions
  1. Preheat the oven to 400 degrees
  2. Mix all ingredients together in a whole (that easy!!)
  3. Grease or line muffin tin
  4. Fill cups (this batch will make ⅞ muffins)
  5. Bake in the oven for 20-25 minutes or until a toothpick comes out clean
3.3.2019


glutenfreebananapumpkinmuffins

Filed Under: Breakfast, Desserts & Baked Goods · Tagged: allergen free, banana, breakfast, cinnamon, dairy free, gluten free, grain free, healthy, muffin, paleo, pumpkin, quick, snack, vegetarian, yeast free

The Best Gluten Free ‘Sugar’ Cookies

August 22, 2020 · by Meg · 1 Comment

The Best Gluten Free ‘Sugar’ Cookies

We recently celebrated Zoey’s first birthday - I’m not really quite sure where 1 year went! Here she is shoving her face full of birthday cupcakes at school (gluten free & dairy free, of course)!!

zoeybirthday3

One thing I also sent to school with Zoey were these awesome ‘sugar’ cookies - they really are the best gluten free ’sugar’ cookies!!!! The kids really loved them and I don’t mind giving Zoey a treat knowing it’s gluten free and as ‘healthy’ as it can possibly be, not full of anything processed. Sometimes I think I’m crazy when I make everything homemade (time consuming), but at least I know what’s in them and what she’s eating - plus these really are the best gluten free ‘sugar’ cookies.

IMG_3342

You would never know I’ve replaced everything bad that comes in a normal sugar cookie and replaced it with much better ingredients! I also love making sugar cookies because I love all the fun cookie cutters you can use to make them way more fun - my Mom bought me a bag of 100 different cookie cutters last year for Christmas, and I don’t think I will ever have a shortage of any cookie cutter I’m looking for!

Print
The Best Gluten Free ‘Sugar' Cookies
Author: Meg Staples
Recipe type: Cookie
Prep time:  1 hour
Cook time:  8 mins
Total time:  1 hour 8 mins
Serves: 38-48 cookies
 
Ingredients
  • 1.5 cups Gluten Free Enjoy Life All Purpose Flour
  • ½ cup coconut oil, melted
  • ¼ cup coconut sugar
  • 1 egg
  • 1 tbsp vanilla extract
  • 1 tsp baking powder
Instructions
  1. Mix coconut oil & coconut sugar together
  2. *beating in a mixer will make it much easier, but not necessary
  3. Add the egg, vanilla extract, and beat until blended
  4. Add the flour and baking powder until completely combined.
  5. Remove from the bowl and roll into a ball.
  6. Place the ball of dough on a plate or in a ball (covered by plastic wrap or a dish towel) for 30-45 minutes.
  7. Preheat the oven to 350 degrees
  8. Remove dough from refrigerator and use extra gluten free all purpose flour to sprinkle on your countertop (I like putting some on my rolling pin too).
  9. Roll the dough out to the desired thickness (around ¼ inch seems to work the best)
  10. * I did mine in small sections, I just found this easier
  11. Cut the dough with your cutters and place onto your silpat or greased baking sheet
  12. *you’ll get 38-48 cookies depending on how big your cookie cutters are
  13. Bake for 8-10 minutes until the cookies are faintly golden brown on the edges.
  14. Allow to cool before eating! (I like this wire rack the best)
3.3.2019

glutenfreesugarcookies

Filed Under: Desserts & Baked Goods · Tagged: allergen free, cookie, dairy free, dessert, easy, enjoy life, gluten free, healthy, party, snack, sugar cookies, treat, yeast free

Vegan S’mores Smoothie

July 14, 2020 · by Meg · 1 Comment

Vegan S’mores Smoothie

smoresmoothie

What is better than s’mores on a summer night? Not too much, right? I do really love a gooey s’more every once in a while, but most of the ingredients aren’t very good for you, unfortunately. A little splurge every once in a while isn’t so bad, but if there’s a way that I can make them healthier, I’m going to do it! (and that way I can have a few more). This smoothie was inspired by the s’more, the perfect summer treat! Just as decadent, though. I used So Delicious Coco Whip as the ‘marshmellow’ (really awesome cool whip that is vegan that So Delicious just came out with). I highly recommend it if you haven’t already tried it! But I really love either The Urban Poser’s or 100 Days of Real Food’s marshmallow recipe if you want to use the real deal (and both really easy to make). I promise you will really love this recipe!

What is your favorite summer treat?

Print
Vegan S’mores Smoothie
Author: Meg Staples
Recipe type: Smoothie
Prep time:  5 mins
Total time:  5 mins
Serves: 2 smoothies
 
Ingredients
  • 1 cup So Delicious Coco Whip or 4 homemade marshmellows
  • 1 cup non dairy milk
  • 4 gluten free graham crackers (homemade or store bought)
  • 1 tablespoon raw cocao powder
  • Enjoy Life Chocolate Chips (to sprinkle on top if desired) feel free to add some in the smoothie if you want!
  • ice to taste
Instructions
  1. Place all ingredients in a blender & serve immediately
3.3.2019

glutenfreevegansmoresmoothie

Filed Under: Desserts & Baked Goods, Smoothies & Drinks · Tagged: decadent, dessert, egg free, gluten free, grain free, s'mores, smoothie, summer, vegan, yeast free

Perfect Summer Salad

July 3, 2020 · by Meg · Leave a Comment

Perfect Summer Salad

IMG_3094

Summer is officially here! (well, it has been for a while). What is your favorite summer activity? It’s never officially ‘summer’ for me until we’ve headed to the cape at the end of June, and we stay the entire month of July. It’s been cool, but we’re having a great time so far!

Also FYI for anyone living around Marylou’s, they now carry stevia and almond milk!! Yahoo! Anyways….

This is the perfect summer salad - and my go to when I’m hosting dinner, or I need to bring something over to a party! Easy, simple, and a very light dressing to accompany it. You can make it this way, or make it your perfect summer salad by adding (or subtracting) whatever ingredients you like. Mine incorporates red onion, tomatoes, cucumber, peppers, avocado and carrots. Sometimes it’s nice to have a lettuce free salad! What is your favorite salad ingredient?

Print
Perfect Summer Salad
Author: Meg Staples
Recipe type: salad
Prep time:  10 mins
Total time:  10 mins
Serves: 4
 
Ingredients
  • 1 avocado, sliced and cubed
  • 2 large tomatoes, washed and cubed
  • 1 cucumber, washed and cubed
  • ½ cup shredded carrots
  • 1 peppers, washed and cubed
  • ½ cup red onion, washed and chopped
for the dressing
  • 2 lemons, juiced
  • 2 tablespoons organic italian seasoning
Instructions
  1. Wash and chop all vegetables as needed or desired
  2. Place all ingredients in a bowl and toss with lemon juice and italian seasoning
  3. Serve immediately
3.3.2019

perfect summer salad

Filed Under: Appetizers & Sides, Entrees · Tagged: appetizer, avocado, carrots, cucumber, dinner, easy, egg free, entree, gluten free, grain free, healthy, lemon juice, paleo, pepper, salad, summer party, tomato, vegan, vegetarian, yeast free

Nut Free Strawberry Lemon Blender Muffins

June 27, 2020 · by Meg · Leave a Comment

Nut Free Strawberry Lemon Blender Muffins

IMG_3222

The other day my Mom & I went strawberry picking and we ended up with about 20 pounds of strawberries! It is definitely one of my favorite fruits… although, I never met a fruit I really didn’t like! I knew I had to act fast with my strawberries (I washed the rest and put them in the freezer), so my first thought was muffins. I kind of love muffins.

Jake does not like what he calls ‘chunks’, so I knew in order for him to taste test and enjoy them, they had to be ‘chunk’ free, hence the use of the blender. I didn’t mind though, it makes them easy. I also really love the combination of strawberry and lemon, (try my strawberry lemonade popsicles) so I thought I’d give that a whirl in putting these together. So, here they are, my nut free, strawberry lemon blender muffins. They are also paleo and gluten free, of course (not vegan, sorry). I love my eggs! What is your favorite flavor of muffin?

Print
Nut Free Strawberry Lemon Blender Muffins
Author: Meg Staples
Recipe type: muffin
Prep time:  5 mins
Cook time:  20 mins
Total time:  25 mins
Serves: 6 muffins
 
Ingredients
  • 3 eggs
  • zest of one lemon
  • juice of one lemon
  • 1 cup strawberries, fresh or frozen
  • ¼ cup coconut flour
  • ¼ cup non dairy milk
  • 2 tablespoons coconut oil, melted + more for greasing
  • 1 tablespoon stevia or coconut sugar (optional, for sweetness)
  • ¼ teaspoon baking powder
Instructions
  1. Preheat the oven to 400 degrees
  2. Wash strawberries if needed
  3. Put all ingredients in a blender or food processor and buzz until smooth
  4. Line muffin tin with liners or grease with coconut oil
  5. Disperse batter evenly among 6 muffin cups
  6. note: place ½ strawberry on each muffin for garnish if desired
  7. Bake for 18-22 minutes or until a toothpick comes out clean
  8. *fill empty cups half way with water for more even baking
  9. Allow to cool & enjoy
3.3.2019

nutfreestrawberrylemonmuffins

Filed Under: Breakfast, Desserts & Baked Goods · Tagged: allergen free, breakfast, coconut flour, dairy free, easy, gluten free, grain free, healthy, lemon, muffin, nut free, paleo, snack, strawberry, vegetarian, yeast free

Paleo & Nut Free Lemon Blueberry Muffins

June 10, 2020 · by Meg · 7 Comments

Paleo & Nut Free Lemon Blueberry Muffins

IMG_3192

It’s summer & it’s berry season! I’ve been super duper craving muffins lately, and I still have an obscene amount of blueberries in the freezer from last summer, and knowing that we’re going to go again soon, I want to use them up. So lemon blueberry muffins it is (and they are nut free)! That means lots of blueberry smoothies, etc! Although I love blueberries (and lemons), my favorite berry is the blackberry (I have a great recipe for a blackberry smoothie here and a great recipe for blackberry watermelon popsicles here). What is your favorite berry?

1.0 from 1 reviews
Print
Paleo & Nut Free Lemon Blueberry Muffins
Prep time:  10 mins
Cook time:  20 mins
Total time:  30 mins
Serves: 5 muffins
 
Ingredients
  • 3 eggs
  • zest of one lemon
  • juice of one lemon
  • ¾ cup blueberries, fresh or frozen
  • ¼ cup coconut flour
  • 2 tablespoons coconut oil, melted + more for greasing
  • 1 tablespoon stevia or coconut sugar (optional, for sweetness)
  • 1 tablespoon non dairy milk
  • ¼ teaspoon baking powder
  • ¼ teaspoon vanilla extract
Instructions
  1. Preheat oven to 400 degrees
  2. Wash blueberries if needed
  3. Combine dry ingredients, sift thoroughly
  4. Combine wet ingredients (except blueberries) and mix well
  5. Combine wet and dry ingredients and mix well
  6. Gently fold in blueberries
  7. Line 5 muffin cups or grease with extra coconut oil
  8. bakers note: if you add water to empty muffin cups (1/2 full) muffins will bake more evenly
  9. Bake 18-22 minutes or until a toothpick comes out clean
  10. Allow to cool before eating
3.3.2019

paleolemonblueberrymuffins

Filed Under: Breakfast, Desserts & Baked Goods · Tagged: blueberry, easy, easy breakfast, gluten free, grain free, high protein, lemon, low carb, muffin, nut free, paleo, yeast free

21 DSD Cocoa Banana Nut Muffins

May 18, 2020 · by Meg · 3 Comments

I’m still doing the whole 21 Sugar Detox thing! I actually cheated a little bit yesterday after my race. I completed a marathon relay with 4 other great woman on my team, and nine groups of Mom’s Run This Town. SO much fun & I had a blast. Here’s a photo of me & Zoey when I got home. She liked playing with the medal, of course!

So the day was outstanding, except for the fact that I ate some candied walnuts, a slice of cheese pizza and a donut. And then I proceeded to have a pounding headache until I went to bed despite guzzling about 20 million gallons of water. So while I normally feel crappy after eating a dairy product, this one really hit home for me. This whole not eating any sugar thing is working. And clearly making me feel a lot better - and I have lost 4 pounds. So thank you 21 Day Sugar Detox Books & Diane Sanfilippo!

These cocoa banana nut muffins are 21 DSD friendly, so I need to let you know in advance that they are not sweet! repeat: not sweet! I put this recipe together specifically to have something muffin and bread like, because that is a no-no, and going into week 3 I needed something. They definitely satisfy the bread like quality I was going for, but with no sugar involved. The banana and almond butter provide a hint of that, but that’s it, for the most part. Anyways, you’ve been warned! Do not expect otherwise - and happy detoxing!!

Print
21 DSD Cocoa Banana Nut Muffins
Author: Meg Staples
Recipe type: Muffin
Prep time:  10 mins
Cook time:  20 mins
Total time:  30 mins
Serves: 12 muffins
 
Ingredients
  • 1 cup almond flour
  • ¾ cup almond or coconut milk
  • 2 green tipped bananas
  • ¼ cup almond butter
  • ⅔ cup slivered almonds
  • ⅓ cup raw cocao nibs
  • 2 eggs
  • 1 tablespoon cinnamon
  • 1 teaspoon vanilla extract
  • 1 teaspoon baking soda
Instructions
  1. Preheat the oven to 350 degrees
  2. Line or grease muffin tins (with coconut oil or muffin liners)
  3. Put all ingredients except almonds and cocao nibs in the blender or food processor, buzz until smooth
  4. Pour blender contents in a bowl, gently fold in almonds & nibs
  5. Distribute equally among 12 muffin tins
  6. Bake 18-22 minutes or until a toothpick comes out clean
  7. Remove from oven & allow to cool before eating
3.2.2019

cocoabanananut21dsdmuffins

Filed Under: Breakfast, Desserts & Baked Goods · Tagged: 21 day sugar detox, 21 DSD, allergen free, almond butter, banana, breakfast, chocolate, cinnamon, gluten free, grain free, healthy, muffin, paleo, snack, sugar free, vegetarian, weight loss, yeast free

Springtime Vegetable Pot Pie

May 12, 2020 · by Meg · Leave a Comment

Springtime Vegetable Pot Pie

IMG_3069

This isn’t 21 DSD friendly (something I am doing right now, more recipe for that soon) but I made 4 of these Spring Vegetable Pot Pie’s before I went on the detox and stuck them in the freezer (not after having one for my lunch the next few days, of course). I know they will be great go to’s for dinner at the end of the school year with all of the hustle and bustle going on. I opted to make 2 mini pot pies, but you could make one big one if you were feeding a family (double the recipe for 2 or 4, to store in the freezer for later). It’s easy because you throw all the veggies you’d like into a pan with some flour & stock & voila! You have your filling! The crust is a simple recipe I use from The Coconut Mama (no need to reinvent the wheel!). These spring vegetable pot pies are really easy to make and roll out for the top and the bottom of the pies. You can switch up your own veggies, add chicken if you have meat eaters on your hands, etc. Either way it’s a really easy dinner & even more easy to make extra back ups for freezing! Enjoy!

Print
Springtime Vegetable Pot Pie
Author: Meg Staples
Recipe type: Vegetable Pot Pie
Prep time:  20 mins
Cook time:  20 mins
Total time:  40 mins
Serves: 1 pot pie
 
Ingredients
  • 1 small onion, peeled & chopped roughly chopped
  • 2 large carrots, peeled, washed & chopped
  • 1 cup string beans, washed and chopped
  • 2 cups corn from corn on the cob
  • ¼ cup coconut flour
  • 1½ cups vegetable stock
  • ½ cup non-dairy milk
  • ⅔ cup frozen sweet peas
  • 1 tablespoon thyme
  • 1 tablespoon oregano
  • 1 tablespoon rosemary
  • 1 tablespoon coconut oil for cooking veggies
  • salt & pepper to taste
Instructions
  1. Wash & chop all veggies
  2. Prepare pie crust *see recipe for The Coconut Mama’s Coconut Flour Pie Crust above*
  3. In a large pan, heat the coconut oil on medium heat until melted
  4. Add all of the veggies & cook until barely tender
  5. Stir in milk, vegetable stock, coconut flour & spices
  6. Mix until flour is dissolved
  7. Reduce heat & allow to cook for another 5-7 minutes
  8. Change oven temperature from 400 to 375 degrees
  9. Pour filling into the bottom of the pie crust (or 2 small pie pans if desired)
  10. Roll out the remaining pie crust to cover the top
  11. Poke four small slits in the top to allow steam to come out
  12. Spread extra melted coconut oil (1 tablespoons) for a more golden crust
  13. Bake for 17-20 minutes or until edges brown
  14. Enjoy!
3.2.2019

glutenfreepaleovegetablepotpie

Filed Under: Entrees · Tagged: allergen free, coconut flour, dairy free, easy, easy dinner, gluten free, grain free, healthy, nightshade free, nut free, paleo, pot pie, vegetables, vegetarian, veggies, weight loss, yeast free

  • 1
  • 2
  • 3
  • Next Page »

Subscribe via Email

Connect with Veggie Staples

  • Email
  • Facebook
  • Instagram
  • Pinterest
  • RSS
  • Twitter

Meet Meg

Hi! My name is Meg, owner and blog writer for Veggie Staples! Thanks for stopping by! I love creating healthy, yummy recipes for everyone to enjoy (meat and non-meat eaters alike)! For more information check out my About Me page. Read More…

Search Recipes

FitFluential Is Fitness Found
myTaste.com

Copyright © 2019 | Innovative by The Pixelista | Built on the Genesis Framework